
BreakingModern — Heard enough about the upcoming Windows 10 to pique your curiosity? Would you be interested in trying it for free, right now? Or would you like to be able to give Microsoft your input while it can still make changes? The good news is you can do all three. Just install the Windows 10 Technical Preview.
Installation Process
The install process is fairly simple — all you need is a spare computer or hard drive big enough to be partitioned, creating space to hold the new operating system. Since this preview is beta software (which may have bugs and glitches) I don’t advise installing it on any computer that you currently use for everyday work.
According to Microsoft the minimum system requirements are:
- Processor: 1 gigahertz (GHz) or faster
- RAM: 1 gigabyte (GB) (32-bit) or 2 GB (64-bit)
- Free hard disk space: 16 GB
- Graphics card: Microsoft DirectX 9 graphics device with WDDM driver
- A Microsoft account and Internet access
You’ll also need a 4GB flash drive for the 32-bit version, or 8GB for the 64-bit version.
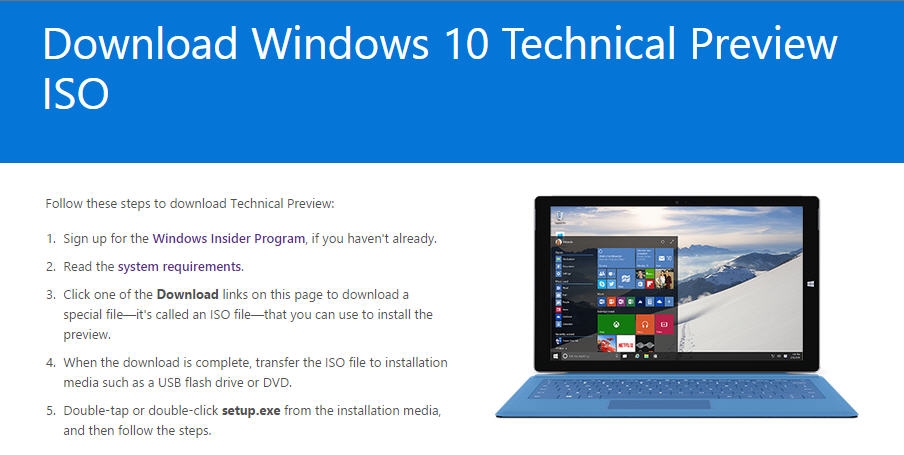
To obtain a copy of this Windows 10 Technical Preview you’ll need to use your Microsoft account to sign up for the Windows Insider Program and accept the program agreement. Then go to the download ISO file area. You cannot install Windows from the ISO file until you copy it to a USB flash drive or DVD.
Creating a USB flash drive is the easiest. Although Microsoft suggests using a utility called the “Windows 7 USB/DVD Download tool,” I find the free utility Rufus works better.
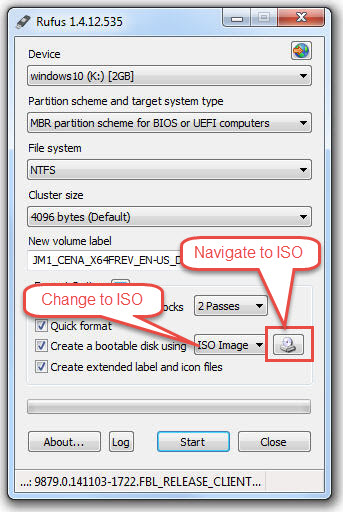
First, make sure that your flash drive doesn’t contain any important information. Then download Rufus (or the Windows counterpart) and click to run it. Next insert your flash drive. Rufus will automatically detect the drive.
On the Rufus screen you will see a choice that says “Create a bootable device using” — Select “ISO Image.” Then navigate to the Windows 10 ISO file that you just downloaded. Click Start and Rufus will perform its magic. Just let it run until it says “done” at the bottom of the screen.
BIOS Boot Order
Remove the USB drive from the computer and take it over to the machine where you want to install Windows 10 Technical Preview.
You may need to change the boot order in the BIOS. Watch the computer screen as it boots to determine which key to press to get to the BIOS. F2 is a common key to use, but your computer may be different. Once you get into the BIOS, change the boot order so the computer will boot to the USB drive first. Remember that you will be navigating by using the arrow keys. Also, be sure to insert the bootable flash drive before you start the computer, as some computers will not give you the option to boot from such a drive if it’s not inserted.
Then it’s as simple as following the Windows 10 installation instructions. You’ll be able to get a first-hand look at Microsoft’s new operating system. Happy computing!
For BMod, I’m Sandy Berger.
Featured Image/All Screenshots: Sandy Berger Courtesy of Windows


![Pete Rose Continues to be Out of Step with Major League Baseball [commentary]](../wp-content/uploads/2015/10/HEADER2-321x214.png)


![The Legend of Zelda: The Wind Waker HD [review]](../wp-content/uploads/2015/10/HEADER-321x214.jpg)
![Madden NFL Mobile [review]](../wp-content/uploads/2015/09/header3-60x60.jpg)

![Call of Juarez: Bound in Blood [review]](../wp-content/uploads/2015/09/HEADER--60x60.jpg)
![Command & Conquer: Red Alert 3 [review]](../wp-content/uploads/2015/09/HEADER-60x60.jpg)